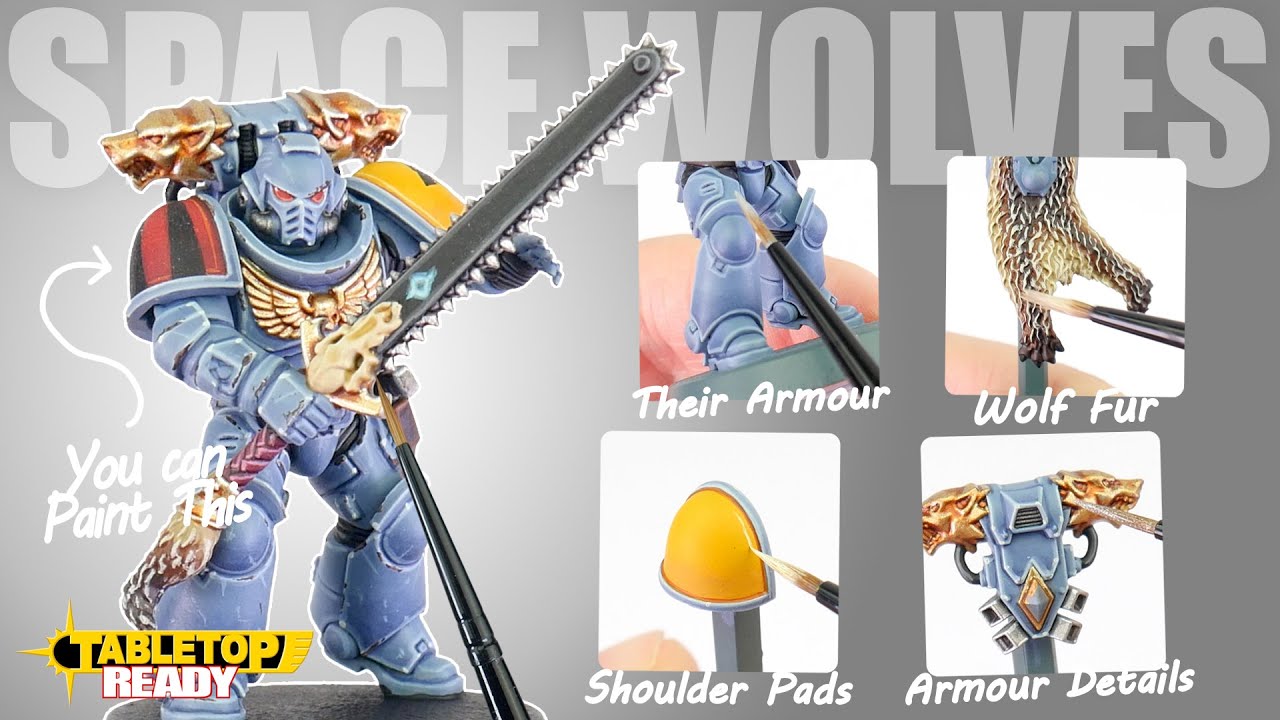
Learn to paint a Space Wolves Blood Claw with iconic blue-grey power armor and yellow shoulder pads. The tutorial also covers how to create a frosted Fenrisian base with ice crystals and cracked earth effects, using various base, layer, shade, contrast, and technical paints.
Steps
Base Preparation
3 steps-
1. Apply a layer of 'Ardcoat varnish to the base to help the texture paint crackle more.
Ardcoat Warhammer Colour (Citadel) -
2. Apply Agrellan Earth texture paint to the base, being careful around the model's feet. If any gets on the model, wipe it away before it dries.
Agrellan Earth Warhammer Colour (Citadel) -
3. Apply a second layer of 'Ardcoat varnish to seal the texture paint, preventing it from flaking off.
Ardcoat Warhammer Colour (Citadel)
Undercoat
-
Undercoat the model with Mechanicus Standard Grey Spray.
Mechanicus Standard Grey Warhammer Colour (Citadel)
Power Armour
7 steps-
1. Paint the iconic blue-grey armour with a thin coat of Russ Grey, applying it all over the armour without being too neat.
Russ Grey Warhammer Colour (Citadel) -
2. Thin down Dark Reaper with water and use it as a recess shade for the armour panels.
Dark Reaper Warhammer Colour (Citadel) -
3. Apply a highlight to all the edges of the armour with Fenrisian Grey using a medium layer brush, taking your time for neatness.
Fenrisian Grey Warhammer Colour (Citadel) -
4. Build up the yellow shoulder pads and knee pads with super thin coats of Averland Sunset, applying in a few coats to avoid chunkiness.
Averland Sunset Warhammer Colour (Citadel) -
5. Thin Gryph-Hound Orange Contrast paint with Lahmian Medium (1 part paint to 3 parts medium) and apply it to the lower half of the yellow shoulder and knee pads for shading.
Gryph-Hound Orange Warhammer Colour (Citadel) -
6. Go back over the yellow pads with Averland Sunset to bump up the bright yellow.
Averland Sunset Warhammer Colour (Citadel) -
7. Apply fine line highlights to the armour edges with Blue Horror, focusing on the most prominent edges like the front piece of the armour, arms, and legs.
Blue Horror Warhammer Colour (Citadel)
Details
11 steps-
1. Block in the undersuit, weapon, and the large belt with Black Legion, which provides super smooth coverage in one coat.
Black Legion Warhammer Colour (Citadel) -
2. Paint metallic areas with Balthasar Gold for a brassy undertone.
Balthasar Gold Warhammer Colour (Citadel) -
3. Apply a coat of Leadbelcher to any silver metallic areas.
Leadbelcher Warhammer Colour (Citadel) -
4. Paint Mephiston Red onto any jewels, lenses, and for detailing on the knee pad.
Mephiston Red Warhammer Colour (Citadel) -
5. Block in red triangle markings onto the armour with Mephiston Red using a medium layer brush.
Mephiston Red Warhammer Colour (Citadel) -
6. Block in the tabard with Barak-Nar Burgundy.
Barak-Nar Burgundy Warhammer Colour (Citadel) -
7. Apply Zandri Dust onto the fur and any teeth adorning the model.
Zandri Dust Warhammer Colour (Citadel) -
8. Paint any rune tokens with Mechanicus Standard Grey.
Mechanicus Standard Grey Warhammer Colour (Citadel) -
9. Apply Agrax Earthshade onto most of the model, excluding the blue armour, for shading.
Agrax Earthshade Warhammer Colour (Citadel) -
10. Apply a very fine line of Evil Sunz Scarlet onto lenses, jewels, and painted patterns for extra highlights.
Evil Sunz Scarlet Warhammer Colour (Citadel) -
11. Paint the brass metallic areas with Retributor Armour to give them a slight gold tint.
Retributor Armour Warhammer Colour (Citadel)
Base Finish
6 steps-
1. Cover the entire base with Corax White, building up with a few coats.
Corax White Warhammer Colour (Citadel) -
2. Give a careful drybrush of White Scar over the base.
White Scar Warhammer Colour (Citadel) -
3. Paint the ice crystals with Pylar Glacier Contrast paint, thinned with Lahmian Medium (1 part paint to 4 parts medium) for a subtle blue tint.
Pylar Glacier Warhammer Colour (Citadel) -
4. Carefully dot Talassar Blue into the center of each ice crystal using a drybrushing technique to add depth.
Talassar Blue Warhammer Colour (Citadel) -
5. Give the entire base a final drybrush of White Scar for a quick highlight.
White Scar Warhammer Colour (Citadel) -
6. Apply Valhallan Blizzard heavily around the model's feet and around the crystals and rocks on the base to seal the deal with a snow effect.
Valhallan Blizzard Warhammer Colour (Citadel)
Paints used
23 paints- Ardcoat Warhammer Colour (Citadel) · Technical
- Agrellan Earth Warhammer Colour (Citadel) · Technical
- Mechanicus Standard Grey Warhammer Colour (Citadel) · Base
- Russ Grey Warhammer Colour (Citadel) · Layer
- Dark Reaper Warhammer Colour (Citadel) · Layer
- Fenrisian Grey Warhammer Colour (Citadel) · Layer
- Averland Sunset Warhammer Colour (Citadel) · Base
- Gryph-Hound Orange Warhammer Colour (Citadel) · Contrast
- Blue Horror Warhammer Colour (Citadel) · Layer
- Black Legion Warhammer Colour (Citadel) · Contrast
- Balthasar Gold Warhammer Colour (Citadel) · Base
- Leadbelcher Warhammer Colour (Citadel) · Base
- Mephiston Red Warhammer Colour (Citadel) · Base
- Barak-Nar Burgundy Warhammer Colour (Citadel) · Base
- Zandri Dust Warhammer Colour (Citadel) · Base
- Agrax Earthshade Warhammer Colour (Citadel) · Shade
- Evil Sunz Scarlet Warhammer Colour (Citadel) · Layer
- Retributor Armour Warhammer Colour (Citadel) · Base
- Corax White Warhammer Colour (Citadel) · Base
- White Scar Warhammer Colour (Citadel) · Layer
- Pylar Glacier Warhammer Colour (Citadel) · Contrast
- Talassar Blue Warhammer Colour (Citadel) · Contrast
- Valhallan Blizzard Warhammer Colour (Citadel) · Technical