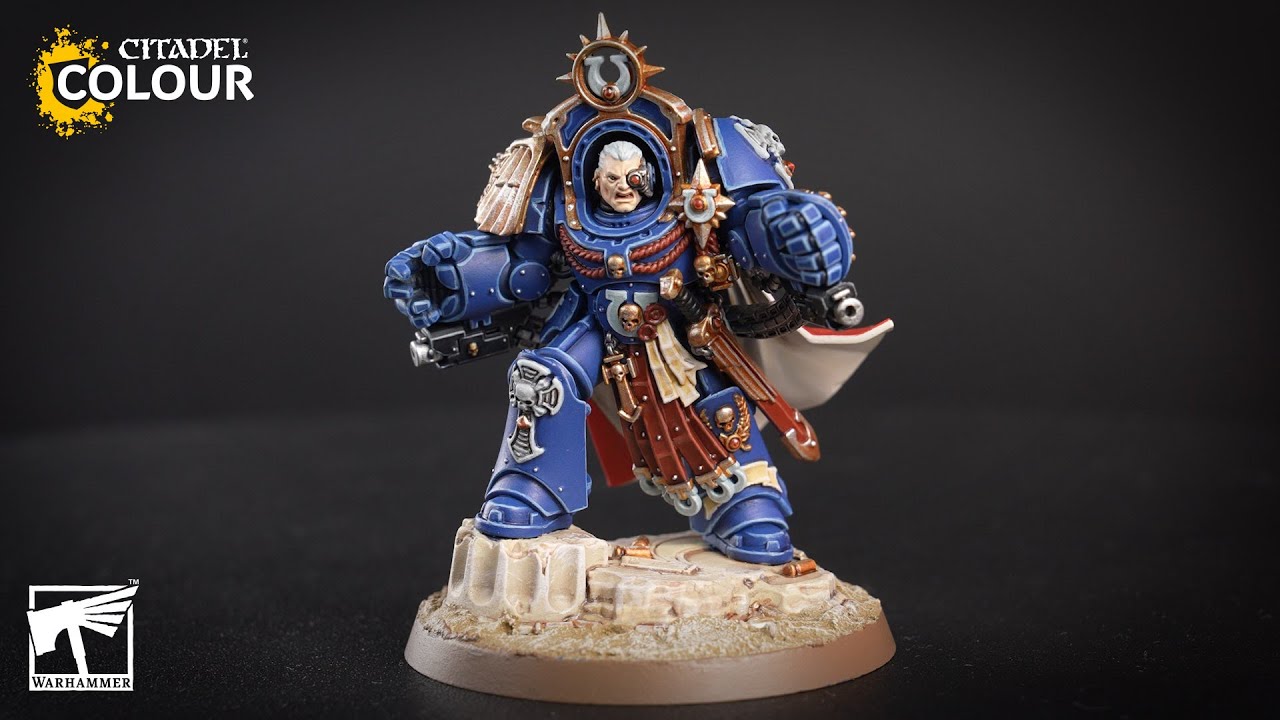
The video provides a detailed tutorial on painting Marneus Calgar, covering priming, base coating, shading, layering, and edge highlighting various intricate details including gold, red cloth, grey armor elements, silver metallics, and skin. It concludes with an advanced technique for seamlessly integrating a decal onto the cloak.
Steps
Priming
3 steps-
1. Prime Calgar using Macragge Blue spray.
Macragge Blue Warhammer Colour (Citadel) -
2. Prime one side of the cloak with Mephiston Red spray.
Mephiston Red Warhammer Colour (Citadel) -
3. Prime the other side of the cloak with Ossified Earth spray.
Ossified Earth Colour Forge
Gold Details
4 steps-
1. Base all gold areas using Dragon's Gold.
Dragon's Gold Two Thin Coats -
2. Shade the gold with Reikland Fleshshade.
Reikland Fleshshade Warhammer Colour (Citadel) -
3. Highlight the gold with Glistening Gold.
Glistening Gold Two Thin Coats -
4. Apply a final edge highlight to the gold with White Gold.
White Gold Pro Acryl
Grey/Stone Details
4 steps-
1. Base the grey or stone areas with Dawnstone.
Dawnstone Warhammer Colour (Citadel) -
2. Shade the grey/stone areas and armour with Nuln Oil.
Nuln Oil Warhammer Colour (Citadel) -
3. Highlight the raised elements of the grey/stone areas with Dawnstone, leaving darker colours in the recesses.
Dawnstone Warhammer Colour (Citadel) -
4. Finish highlighting the grey/stone areas with Grey Seer, keeping the highlight inside the previous Dawnstone layer.
Grey Seer Warhammer Colour (Citadel)
Silver Metallics
3 steps-
1. Base all silver metallic areas with Dark Aluminium.
Dark Aluminium AK Interactive -
2. Shade the silver areas with Nuln Oil, painting into the recesses.
Nuln Oil Warhammer Colour (Citadel) -
3. Highlight all silver areas by dragging your brush across sharp edges with Chrome.
Chrome (Metallic) Vallejo Model Air
Red Cloth (Cloak and Tabard)
8 steps-
1. Paint all the recesses of the cloak and the tabard with Khorne Red.
Khorne Red Warhammer Colour (Citadel) -
2. Shade the leather sword scabbard and the tabard elements coming down from the groin area with Nuln Oil.
Nuln Oil Warhammer Colour (Citadel) -
3. Edge highlight the tabard and leather with Wazdakka Red.
Wazdakka Red Warhammer Colour (Citadel) -
4. Apply a fine highlight to the red leather with Squig Orange.
Squig Orange Warhammer Colour (Citadel) -
5. Layer the red parts of the back of the cloak with Mephiston Red, tidying up any mistakes.
Mephiston Red Warhammer Colour (Citadel) -
6. Highlight the most prominent folds of the cloak and the cord across Calgar's chest with Evil Sunz Scarlet.
Evil Sunz Scarlet Warhammer Colour (Citadel) -
7. Apply fine edge highlights to the cord and cloak folds with Wild Rider Red.
Wild Rider Red Warhammer Colour (Citadel) -
8. Apply a final highlight to the cloak folds with Fire Dragon Bright, focusing on areas that catch the most light.
Fire Dragon Bright Warhammer Colour (Citadel)
Bone/Parchment (Cloak Interior and Purity Seals)
7 steps-
1. Paint the cloak interior recesses with a 50:50 mix of Morghast Bone and XV-88 (or 3:1 Morghast Bone to XV-88).
Morghast Bone Warhammer Colour (Citadel) -
2. Paint the cloak interior recesses with a 50:50 mix of Morghast Bone and XV-88 (or 3:1 Morghast Bone to XV-88).
XV-88 Warhammer Colour (Citadel) -
3. Highlight the prominent folds of the cloak interior with Screaming Skull.
Screaming Skull Warhammer Colour (Citadel) -
4. Base the purity seal parchment and scrollwork with Rakarth Flesh.
Rakarth Flesh Warhammer Colour (Citadel) -
5. Shade the parchment and scrollwork with Agrax Earthshade, ensuring not to pool too heavily in recesses.
Agrax Earthshade Warhammer Colour (Citadel) -
6. Highlight the parchment and scrollwork, leaving Agrax Earthshade in the deepest recesses, with Rakarth Flesh.
Rakarth Flesh Warhammer Colour (Citadel) -
7. Edge highlight the parchment with Pallid Wych Flesh.
Pallid Wych Flesh Warhammer Colour (Citadel)
Black Details (Joints and Weapon Grips)
3 steps-
1. Base all black elements including bolt casings, rubber joints between armour, and the sword handle with AK Intense Black.
Black AK Interactive -
2. Highlight the black elements by dragging the brush across sharp edges with Eshin Grey.
Eshin Grey Warhammer Colour (Citadel) -
3. Apply a final finer highlight to the black elements with Dawnstone.
Dawnstone Warhammer Colour (Citadel)
White Details (Ultramarine Symbols)
3 steps-
1. Base the Ultramarine symbols (on tabard, belt, hip plates) and Crux Terminatus stones with Corax White.
Corax White Warhammer Colour (Citadel) -
2. Paint Soulblight Grey towards the bottom of the white elements to create a gradient.
Soulblight Grey Warhammer Colour (Citadel) -
3. Highlight the white elements by dragging the brush across sharp edges with AK White.
White AK Interactive
Skin (Marneus Calgar's Face)
5 steps-
1. Base Calgar's face with Cadian Fleshtone, applying two to three thin coats.
Cadian Fleshtone Warhammer Colour (Citadel) -
2. Wash the face with Reikland Fleshshade, getting it into all recesses and avoiding spillage onto hair or armour.
Reikland Fleshshade Warhammer Colour (Citadel) -
3. Highlight the raised areas of the face (brow, nose, cheekbones, sculpted details) with Cadian Fleshtone.
Cadian Fleshtone Warhammer Colour (Citadel) -
4. Emphasize the highlighted areas of the face with Kislev Flesh, trying to keep it within the previous Cadian Fleshtone layer.
Kislev Flesh Warhammer Colour (Citadel) -
5. Apply final highlights to the most prominent areas of the face (brow, nose, cheekbone under the eye) with Flayed One Flesh.
Flayed One Flesh Warhammer Colour (Citadel)
Hair
-
Paint Calgar's hair with AK White.
White AK Interactive
Eyes
-
Paint the eye with Blood Angels Red.
Blood Angels Red Warhammer Colour (Citadel)
Decal Enhancement
2 steps-
1. Shade the recesses of the decal on the cloak with Grey Seer, feathering it into lighter areas.
Grey Seer Warhammer Colour (Citadel) -
2. Apply Dawnstone into the deepest recesses of the decal to further enhance the painted-on effect.
Dawnstone Warhammer Colour (Citadel)
Power Armour
2 steps-
1. Highlight all sharp edges of the power armour with Calgar Blue.
Calgar Blue Warhammer Colour (Citadel) -
2. Brighten the sharpest areas of the power armour, focusing on corners and brightest edges, with Fenrisian Grey.
Fenrisian Grey Warhammer Colour (Citadel)
Paints used
35 paints- Macragge Blue Warhammer Colour (Citadel) · Base
- Mephiston Red Warhammer Colour (Citadel) · Base
- Ossified Earth Colour Forge · Spray
- Dragon's Gold Two Thin Coats · Metallic
- Reikland Fleshshade Warhammer Colour (Citadel) · Shade
- Glistening Gold Two Thin Coats · Metallic
- White Gold Pro Acryl · Metallic
- Dawnstone Warhammer Colour (Citadel) · Layer
- Nuln Oil Warhammer Colour (Citadel) · Shade
- Grey Seer Warhammer Colour (Citadel) · Base
- Dark Aluminium AK Interactive · Metallic
- Chrome (Metallic) Vallejo Model Air · Air
- Khorne Red Warhammer Colour (Citadel) · Base
- Wazdakka Red Warhammer Colour (Citadel) · Layer
- Squig Orange Warhammer Colour (Citadel) · Layer
- Evil Sunz Scarlet Warhammer Colour (Citadel) · Layer
- Wild Rider Red Warhammer Colour (Citadel) · Layer
- Fire Dragon Bright Warhammer Colour (Citadel) · Layer
- Morghast Bone Warhammer Colour (Citadel) · Base
- XV-88 Warhammer Colour (Citadel) · Base
- Screaming Skull Warhammer Colour (Citadel) · Layer
- Rakarth Flesh Warhammer Colour (Citadel) · Base
- Agrax Earthshade Warhammer Colour (Citadel) · Shade
- Pallid Wych Flesh Warhammer Colour (Citadel) · Layer
- Black AK Interactive · Intense
- Eshin Grey Warhammer Colour (Citadel) · Layer
- Corax White Warhammer Colour (Citadel) · Base
- Soulblight Grey Warhammer Colour (Citadel) · Shade
- White AK Interactive · Intense
- Cadian Fleshtone Warhammer Colour (Citadel) · Layer
- Kislev Flesh Warhammer Colour (Citadel) · Layer
- Flayed One Flesh Warhammer Colour (Citadel) · Layer
- Blood Angels Red Warhammer Colour (Citadel) · Contrast
- Calgar Blue Warhammer Colour (Citadel) · Layer
- Fenrisian Grey Warhammer Colour (Citadel) · Layer