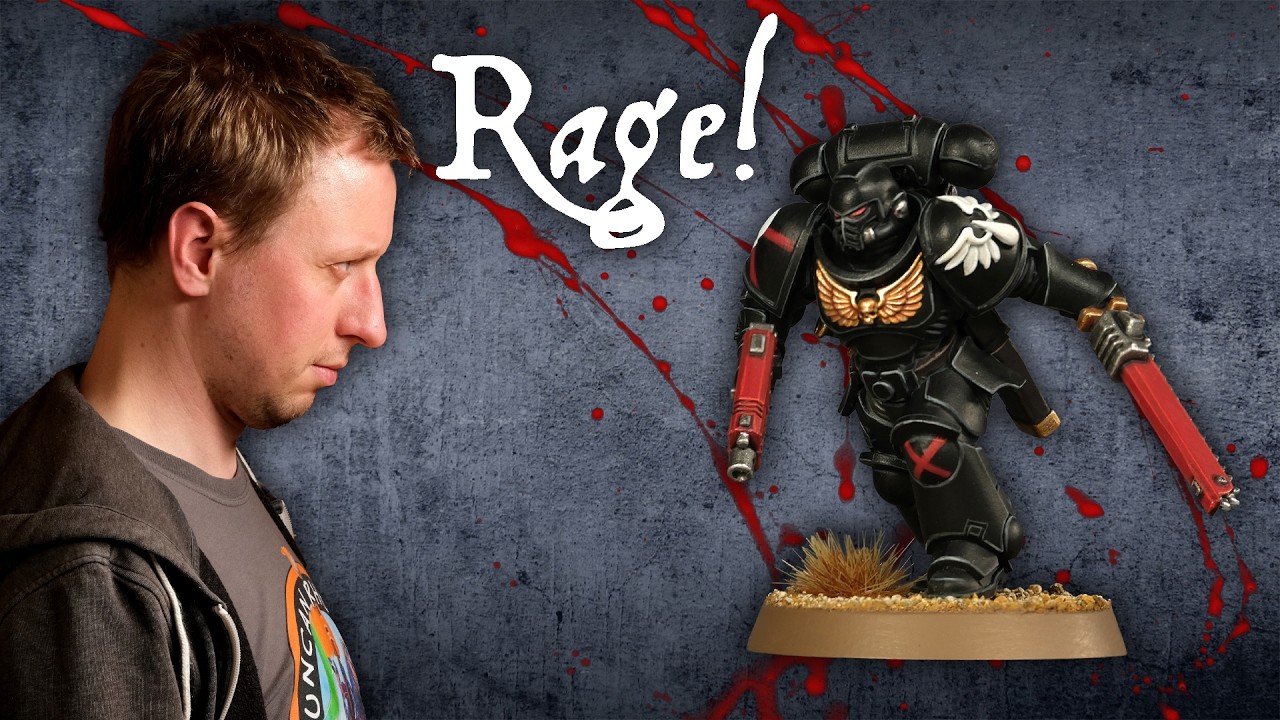
This tutorial guides viewers through painting a Flesh Tearers Space Marine. Key techniques include airbrush pre-shading, layered red mixes for vibrant armour, and controlled oil washes for depth and grimy weathering. The process also covers simple chipping, painting leather, metallic details, and glowing lenses to achieve a battle-worn yet striking look.
Steps
Power Armour
14 steps-
1. Pre-shade by airbrushing Flat White over the entire model, focusing on highlights to be bright white and shadows to be pure black. Thin paint approximately four drops of Tamiya X-20A Thinner to one drop of paint, sprayed at 20-25 PSI.
Flat White Tamiya -
2. Apply a base coat of a thin mixture of Gal Vorbak Red and Burnt Red (Pro Acryl) in a 2:1 ratio (Gal Vorbak Red:Burnt Red) over the darker areas of the armour, building up layers gradually.
Gal Vorbak Red Warhammer Colour (Citadel) -
3. Apply a base coat of a thin mixture of Gal Vorbak Red and Burnt Red (Pro Acryl) in a 2:1 ratio (Gal Vorbak Red:Burnt Red) over the darker areas of the armour, building up layers gradually.
Burnt Red Pro Acryl -
4. Apply a lighter coat of a thin mixture of Wazdakka Red and Burnt Red (Pro Acryl) in a 1:1 ratio over the lighter areas of the armour, focusing on where highlights would naturally fall.
Wazdakka Red Warhammer Colour (Citadel) -
5. Apply a lighter coat of a thin mixture of Wazdakka Red and Burnt Red (Pro Acryl) in a 1:1 ratio over the lighter areas of the armour, focusing on where highlights would naturally fall.
Burnt Red Pro Acryl -
6. Darken the deepest shadows by spraying a thin mixture of Gal Vorbak Red and Black (Vallejo Game Air) into the recesses.
Gal Vorbak Red Warhammer Colour (Citadel) -
7. Darken the deepest shadows by spraying a thin mixture of Gal Vorbak Red and Black (Vallejo Game Air) into the recesses.
Black Vallejo Model Color -
8. Apply Abteilung 502 Black oil paint, thinned with mineral spirits, into the recesses of the armour and then buff and blend the paint from the raised surfaces towards the shadow areas using a soft, slightly damp brush with mineral spirits.
Black Vallejo Model Color -
9. Apply a final varnish coat to the armour using a 50/50 mix of Mig Matte and Ultra Matte varnish.
Matte Mig -
10. Apply a final varnish coat to the armour using a 50/50 mix of Mig Matte and Ultra Matte varnish.
Ultra Matte Mig -
11. Apply small chips and fine scratches along the edges and prominent areas of the red power armour using Wazdakka Red.
Wazdakka Red Warhammer Colour (Citadel) -
12. Apply finer chips and scratches with a lighter, slightly orange-fleshy mix of Flat Flesh and Wazdakka Red.
Flat Flesh Vallejo Model Color -
13. Apply finer chips and scratches with a lighter, slightly orange-fleshy mix of Flat Flesh and Wazdakka Red.
Wazdakka Red Warhammer Colour (Citadel) -
14. Apply a dark brown as weathering along the lower parts of the red armour and around edges to simulate mud/dirt.
Rhinox Hide Warhammer Colour (Citadel)
Black Elements
7 steps-
1. Basecoat black elements (shoulder pads, backpack, gun casing) with Vallejo Model Color Black.
Black Vallejo Model Color -
2. Apply a simple airbrush highlight to black elements using Eshin Grey, focusing on spherical or cylindrical shapes.
Eshin Grey Warhammer Colour (Citadel) -
3. Apply initial chips using Black paint, particularly over decals, to create a painted-on effect.
Black Vallejo Model Color -
4. Sponge chip with Eshin Grey over the black chips for a lighter edge.
Eshin Grey Warhammer Colour (Citadel) -
5. Continue applying Eshin Grey chips, adding a little Dawnstone for lighter chips on prominent areas like the chest eagle.
Eshin Grey Warhammer Colour (Citadel) -
6. Continue applying Eshin Grey chips, adding a little Dawnstone for lighter chips on prominent areas like the chest eagle.
Dawnstone Warhammer Colour (Citadel) -
7. Apply Rhinox Hide as weathering over decals and black armour to blend them into the battle damage.
Rhinox Hide Warhammer Colour (Citadel)
Leather Belts
2 steps-
1. Paint leather belts with Rhinox Hide.
Rhinox Hide Warhammer Colour (Citadel) -
2. Highlight leather belts with Steel Legion Drab.
Steel Legion Drab Warhammer Colour (Citadel)
Metallic Details
3 steps-
1. Basecoat metallic weapon parts with a 50/50 mix of Burnt Iron and Iron Warriors.
Iron Warriors Warhammer Colour (Citadel) -
2. Basecoat metallic weapon parts with a 50/50 mix of Burnt Iron and Iron Warriors.
Iron Warriors Warhammer Colour (Citadel) -
3. Apply a watered-down Ratling Grime as a wash over the metallic parts.
Ratling Grime Warhammer Colour (Citadel)
Lenses
3 steps-
1. Basecoat the lens with Incubi Darkness.
Incubi Darkness Warhammer Colour (Citadel) -
2. Apply Kabalite Green on the bottom edge and middle of the lens, blending towards the center.
Kabalite Green Warhammer Colour (Citadel) -
3. Apply Moot Green as a brighter highlight on the bottom edge of the lens.
Moot Green Warhammer Colour (Citadel)
Paints used
14 paints- Gal Vorbak Red Warhammer Colour (Citadel) · Base
- Burnt Red Pro Acryl · Standard
- Wazdakka Red Warhammer Colour (Citadel) · Layer
- Black Vallejo Model Color · Standard
- Flat Flesh Vallejo Model Color · Standard
- Rhinox Hide Warhammer Colour (Citadel) · Base
- Eshin Grey Warhammer Colour (Citadel) · Layer
- Dawnstone Warhammer Colour (Citadel) · Dry
- Steel Legion Drab Warhammer Colour (Citadel) · Base
- Iron Warriors Warhammer Colour (Citadel) · Base
- Ratling Grime Warhammer Colour (Citadel) · Contrast
- Incubi Darkness Warhammer Colour (Citadel) · Base
- Kabalite Green Warhammer Colour (Citadel) · Layer
- Moot Green Warhammer Colour (Citadel) · Layer
- Flat White Tamiya · Not in our paint list
- Matte Mig · Not in our paint list
- Ultra Matte Mig · Not in our paint list